
Patch coverage 1.0 through 1.0.5. This guide uses release-era patch notes, current game data and dated player reports. A player report shows what worked in that setup. See changes since 1.0 · Latest patch checked
Stack crop plantations in one footprint
Player-reported during the 1.0.5 patch window. Players shared cushion setups on September 23 and November 2, 2026. Build numbers were unspecified. Check worker access and harvest output on your own layout.
- Place one crop plantation inside the Palbox work area. Keep its front clear. A foundation and wall can help line it up.
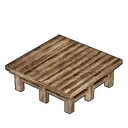
- Center a Japanese Floor Cushion on the plot. It unlocks with the Japanese-Style Furniture Set at Technology 55.
- Use the build alignment control to preview a second plantation above it. Aim along the wall edge until the preview accepts the placement, then build it. Keep the cushion in place.
- Assign planting, watering, gathering and hauling. Watch both layers complete a full crop cycle, then leave and return and check again. Add a layer only if the first two keep producing.
Before level 55. Use separate walkable floors. Start with two floors and confirm that your workers can reach and harvest both before expanding.
November 2 build photos · September 23 player discussion · July 26 placement walkthrough · RageGamingVideos cushion chapter · August 4
Progression, merchants and currencies
- Pin the current mission before an old walkthrough sends you elsewhere. Version 1.0 reworked the main missions and added new NPC quest chains. Check the in-game objective and all marked destinations first. If you returned to an older world, check which missions the game completed from your previous tower wins. 1.0 patch notes
- Pick an uncleared boss when you need Ancient points. The first tower boss win awards five Ancient Technology Points. First-time Alphas and bounties are worth checking for one each. Use Ancient Technical Manuals for repeatable points once nearby first clears are spent. Ancient point sources
- Trade bounty tokens for ordinary Tech if your build is stuck. Check the Bounty Merchant for Advanced Technical Manuals at five Bounty Tokens each. Read the book from inventory. Save Ancient Technical Manuals for the separate Ancient Technology balance. Technology point sources
- Keep an ordinary Tech Point route running in the background. Select a pond catch pool that lists a Technical Manual and assign a Handiwork Pal. Collect the pool while you do other things and check each book’s name before using it. Patch 1.0.4 adjusted fishing and bait yields, so use current reward tables for rates. Jay Dunna · 1.0 fishing and manuals chapter
- Corner Mimog before it bolts. Mimog runs when threatened. Set up a clear catch or knockout attempt if you want Dog Coins. Spend those at a Medal Merchant. Butchering Mimog yields no extra coins. 1.0.5 Dog Coin item data
- Use a Viewing Cage as a solo merchant corner. Players report they can trade with a captured merchant inside a Viewing Cage without using a working base slot. In multiplayer, use a normal merchant route, since the cage is a single-player feature. Player reports · July 18, 2026
- Ask a visiting merchant about ammo and medicine. In 1.0, specialized merchants can visit based on your base level. Check what the visitor stocks before queuing a big batch of ammo, food or medicine that you could buy with spare Gold. 1.0 patch notes
Base layout and shortcuts
- Line up builds before placing them. Use Axis Alignment to line up pieces. Use Replace Mode to swap a compatible wall or foundation without dismantling the whole row. Follow the build-mode button hints for your controls. 1.0 controls and keybinds
- Fix the job before replacing the worker. At the Monitoring Stand, assign a Pal directly to the station you need and disable competing jobs when necessary. Check whether it can reach the station and keep working before you add another Pal. Player reports · November 3, 2026
- Give the slowest worker the shortest route. Put a filtered chest near the output and give your largest Pal a straight approach to its station, food and hot spring. Watch one full trip. Move a chest or doorway if the Pal keeps turning back. Player reports · November 3, 2026
- Choose a hauler for the load. One timed route favored Alpha Eidrolon over Eye of Cthulhu and Mimog. That route used only a few items. Test a full stack and loose drops separately on your own layout before spending Transporting books. Player route test · July 31, 2026
- Leave a destination for every item. Use chest filters and allow transporting on the production order when you want finished items moved. If the order is complete but goods are sitting at the station, check chest filters and space before adding haulers. Player reports · September 25, 2026
- Find the slow step in the farm. If empty plots sit idle, fix Planting. If seedlings wait for water, fix Watering. If crops spend most of the cycle growing, try Lullu. If you want more from each harvest, try Prunelia. 1.0.5 crop and worker data
- Give ranchers a specific product to make. For ordinary Cake, start with Chikipi for Eggs, Mozzarina for Milk and Beegarde for Honey. Fix them to the Ranch if other jobs pull them away. Put a compatible chest and a hauler nearby. 1.0.3 Ranch output data
- Use a Ranch slot to cover an ingredient shortage. If you keep running out of High Quality Pal Oil, try a Dumud. Its Partner Skill lists that Ranch drop. Swap the slot to another producer once you have enough for the next crafting batch. DPJ · 1.0 Ranch drops chapter
- Favorite the pieces you keep swapping between. Favorite your foundation, wall, stairs and support furniture in the Build menu. Keep the handful of pieces for the current project together so you can alternate between them quickly. EPICTREASURE · 1.0 build menu chapter
- Test a second extractor at the edge of one oil node. Community placement trick. Put a regular extractor on the outer edge of a clear node, then try the opposite edge while keeping the camera on the same diagonal. A September Sunlit Isle build shows three pairs. Check that both machines produce after you return to the base. Player build · September 24, 2026
- Check power before adding more oil machines. If an extractor keeps stopping, watch the generator charge during breaks and overnight. Fix the power assignment before scaling. Version 1.0.3 raised oil production speed and cut extractor and generator building costs. 1.0.3 patch notes
- Keep the raid altar away from your main workshop. If you prefer fighting a summoned raid at a base, use a dedicated base with open fighting space and keep your important production and storage elsewhere. 1.0.5 raids and Raid Area
- Reverse the build order when pieces almost fit. In 1.0, players have fit overlapping pieces by placing them in the opposite order. Try it on two empty structures before moving staffed stations, then check that Pals can reach the finished layout. Player reports · July 18, 2026
- Try a shift on Salad before raising the work setting. Players recommend Salad for an inexpensive work-speed and Sanity boost. Put a batch in the Feed Box, verify workers actually eat it, and compare output and breaks with your old food. Player reports · July 18, 2026
- Set up defense before starting a Gold Coin Assembly Line. A base with a Gold Coin Assembly Line can trigger a dedicated raid event. Ordinary base raids also come in waves in 1.0. Place defenses with a clear approach and check for another wave before sending workers back to their stations. 1.0 patch notes
- Change your look in an existing world. Interact with an Antique Dresser to reopen character appearance settings. Build it once at home so you can adjust your character between trips. 1.0.5 Antique Dresser data
- Apply unlocked Pal skins at the Dressing Facility. Build a Pal Dressing Facility and select the Pal and skin there. You can give the trained Pal you already use a new appearance while keeping its stats and skills. 1.0.5 Pal Dressing Facility data
Base Building Tricks · Base operations guide · Compare haulers
Storage, menus and travel
- Empty your pockets from anywhere inside the base. Open Inventory inside the base boundary, choose Easy Bulk Storage, then confirm with Stow. Set exclusions for anything you want to keep on you. Use Quick Stack when you want to transfer matching items to the one chest you have open. 1.0 Easy Bulk Storage walkthrough
- Let a chest collect the items it already holds. Enable the chest option for automatically depositing matching items. This saves opening the chest each time. If crafting cannot see stored ingredients, check chest access permissions and filters. 1.0 patch notes
- Give personal gear its own private chest. Use the chest’s Security Settings to keep one box for your personal equipment. Test with an inexpensive item first, especially in a guild where permissions and access matter. FROSTSmileZ · 1.0 private storage chapter
- Favorite important Pals before bulk selections. Mark your best workers, parents and battle Pals as Favorites directly from the Palbox. Before you confirm a sale or condensation, review the selected Pals, especially after selecting a whole page. 1.0 patch notes
- Retrieve All before reworking a base crew. Use Retrieve All in the Palbox to recall the base workers in one go. Redeploy and assign the new crew in order, starting with power, food and hauling. 1.0 patch notes
- Keep your key Pals out of expedition auto-select. Open the expedition roster before dispatch and set exclusions for the mounts, breeders and team members you want available. You can reverse exclusions later. 1.0 patch notes
- Fast travel from the map while inside your base. Open the map anywhere inside your base and pick an unlocked destination. You can skip the walk back to the Palbox. 1.0 patch notes
- Revisit an already unlocked Watchtower if the map stays dark. Interact with the Watchtower again to reveal its area. This was specifically addressed in 1.0.4. 1.0.4 patch notes
- Bring a Homeward Thundercloud for the return trip. Use it to return to the nearest base after a gathering run far from a waypoint. Plan around which base is closest, and use it outdoors after you have left any dungeon. 1.0.5 item data
- Try a grapple into a jump for a long crossing. September players report gaining speed for a glide by canceling a grapple into a jump. Practice over flat ground before trying a long crossing. A dedicated-server player reported getting stuck at the grapple point. Player reports · September 15–16, 2026
- Check Hold versus Toggle in your settings. If repeated crafting hurts your hands or gets tiring, check the hold and toggle options. Use the prompts on your platform for actions such as quick stacking and feeding from the Feed Bag. Player reports · September 25, 2026
- Use Emergency Escape if the terrain traps you. Look in Options for Emergency Escape. The 1.0 notes say this action no longer drops items. It also helps if an older save loads outside the new playable boundary. 1.0 patch notes
- Cycle through bases with Snap to Base. Look for the Snap to Base prompt on the world map. Players use it to switch the map focus between distant Palboxes without dragging the map across the islands. Player reports · July 18, 2026
Exploration, mounts and collectibles
- Pack a saddle you can craft now. Check where the Pal can be caught in 1.0 and when its saddle unlocks. Take an early mount on your actual route and compare stamina, landings and handling before starting a long breeding project for flight speed. 1.0 community mount comparison
- Test your mount over water close to shore. Some hovering flyers can recover stamina over water, and others can drop you into a swim. A 1.0 player recommends testing over shallow water first. A mount that both swims and flies can cover more of a coastal route. 1.0 community mount comparison
- Let Tombat check for a cave or chest nearby. Activate Ultrasonic Sensor when you are near a dungeon, treasure chest or scrap and the terrain hides the approach. Use the ping to narrow down which slope or cave mouth to check. 1.0.5 Tombat Partner Skill
- Bring Smokie when you need Chromite. Activate Smokie’s detection skill to locate nearby Chromite. Keep Smokie out and fighting alongside you when you collect it to get its acquisition bonus. The Pal page shows how the bonus changes with rank. RageGamingVideos · 1.0 Chromite chapter
- Use Reptyro Cryst for a run that will fill up with ore. Its party skill reduces ore weight by 35–65% by partner rank. If ore is what stops the trip, keep it in your party and compare carry weight with your usual team before making another trip. Ebontis · 1.0 ore weight chapter
- Use Gumoss for a run that will fill up with wood. Gumoss improves logging efficiency and reduces the weight of wood while in your party. Bring it when gathering wood or hardwood in bulk and compare the weight of one load before heading farther from a waypoint. Ebontis · 1.0 wood weight chapter
- Use Turtacle Terra for sulfur and coal runs. Keep Turtacle Terra in the party when these two materials fill your inventory. Its skill reduces their weight by 80–100% depending on rank. Check your load after swapping party members before you leave the gathering site. 1.0.5 Turtacle Terra Partner Skill
- Bring Nox when hunting nearby Effigies. Activate its reworked detection Partner Skill and follow the result. This is handy for narrowing down a search when you can see the general area but the statue is above or below your route. 1.0 patch notes
- Mark repeat stops for Skill Fruits and wild eggs. July players report the same spots can pay out again after a reset. Mark a route that strings together a few trees or nests near a fast travel point. Check the fruit or egg each time you return. Player reports · July 18, 2026
- Enter Sunreach through the summit portal. Defeat Bjorn and Bastigor at Feybreak Tower, then use the portal above the tower. Bring cold protection for the trip to the tower. Check the fast travel network after arriving before riding out over the gaps. Sunreach portal walkthrough
- Turn up sound effects to hear Lucky Pals. A 1.0 player recommends raising the sound-effects or SE slider and lowering competing audio. Listen for the Lucky cue when your view is blocked by trees or terrain. Player reports · July 18, 2026
Catching and combat
- Tell your Pal to attack without spending ammo. Aim at an enemy and use the on-screen attack command. It is useful for opening a fight or directing your Pal at one target. 1.0 patch notes
- Dodge differently while aiming. Aiming or attacking switches the dodge to a dash, and dodging can preserve your reload. While mounted, use jump plus a direction to cancel a Pal attack if you need to reposition. 1.0 patch notes
- Use one compatible bow for different arrow types. Use the ammo-switch control for Fire, Poison or standard arrows where the bow supports them. Dedicated old Fire and Poison arrow weapon recipes were retired in 1.0. 1.0 patch notes
- Look for a move that helps you keep your catch alive. Some follow-up Partner Skills no longer need gear, and 1.0 prevents those follow-up hits from finishing off a target Pal. Check the specific Partner Skill. Recall an ordinary attacker if its next hit could defeat your target. 1.0 patch notes
- Bring Mimog on a locked-chest route. Deploy Mimog so it is fighting alongside you and try the locked chest. Its key replacement works at base partner rank. Chests that check Work Suitability have a separate requirement. 1.0 patch notes
- Get the species capture bonus before chasing duplicates. Five captures now finish the 1.0 capture bonus for a species. Check the Palpedia and move on to a new species for XP when you have the copies you need. 1.0 patch notes
- Watch for Lucky Pals when you need work books. Lucky encounters can award Work Suitability enhancement items. Catching a Lucky Pal also gives you a worker that starts at a higher rank. 1.0 patch notes
- Use Mercy for the hit and watch the status damage. Equip the Ring of Mercy to weaken a target with direct hits. Version 1.0 players report Burn and Poison can still finish it. Avoid applying those effects near capture range and recall an unmounted combat Pal if it is still attacking. Player reports · July 18, 2026
- Bring Wispaw when you can line up back throws. Wispaw boosts catch rate when the throw earns the back bonus. Keep it in the party and check the bonus on the throw preview before spending a high-tier sphere. 1.0.5 Wispaw Partner Skill
- Bring Muffly for a Freeze capture setup. Keep Muffly in the party, Freeze the target with another Pal or an equipped attack, and throw while Freeze is active. Check the capture preview before spending your best sphere. 1.0.5 Muffly Partner Skill
- Use Lapure when your team relies on activated Partner Skills. Keep Lapure in the party to shorten the other members’ Partner Skill cooldowns. Test the rotation with the skills you actually activate during a fight. 1.0.5 Lapure Partner Skill
- Carry a Revival Potion for a long fight or route. Pack a potion when you will be too far from base to replace an incapacitated Pal. The item is designed to revive it on the spot. See the revival chapter for other player-reported options. 1.0.5 Revival Potion data
- Try Soaked before using your big Electric move. Players report Water attacks that apply Soaked can set up a stronger Electric hit. Save the Electric attack until you see the status, then compare it with using both moves in the opposite order. Player reports · July 18, 2026
- Carry a fast attack for the gaps between heavy moves. Swap learned active skills in the Pal menu before entering a fight. Pair a low-cooldown move with your slower heavy attacks and check whether an on-element move fits the matchup. Player reports · July 18, 2026
Breeding and training
- Recheck old breeding recipes. Many 1.0 breeding pairs changed. Look up the target in the current calculator and confirm the first egg before filling a farm with Cake. 1.0 patch notes
- Match the Cake to the job. Vegetable Cake is for more eggs, the mutation-focused vegetable cake is for mutation attempts, and Special Cake helps pass down parent traits. Check the item description before committing a batch. 1.0 patch notes
- Use different helpers for egg production and incubation. Braloha speeds up the Breeding Farm while Dynamoff speeds up incubation. Put the helper where your queue is backing up and see whether eggs are arriving faster than you can hatch them. Le Sparks · 1.0 incubation chapter
- Keep spare Cakes in an empty Breeding Farm box. Players report that Cake stays fresh in the farm box. Use a spare farm without a breeding pair when you want to store Cake without spending it. Check one stack on your server first. Player report · July 24, 2026
- Check the Surgery Table before starting another line. Look for an available sex change or a supported passive at the table. That may save an extra breeding step. Check the cost and whether the option is reusable or uses a disposable implant. Player reports · July 20, 2026
- Use Yakumo for eligible capture traits. Fight alongside a Yakumo that has the trait you want when searching for new breeding stock. The Partner Skill can pass eligible traits. Check which passives are excluded before using expensive spheres. 1.0.5 Yakumo Partner Skill
- Check condensed work levels before spending Handbooks. The first three stars can increase one suitability each, and the fourth increases all of a Pal’s suitabilities. Check your worker after condensing before spending Handbooks on the final work levels. 1.0 patch notes
- Bring Broncherry Aqua for manual Alpha egg pickup. Put Broncherry Aqua in your party when picking up eggs by hand. Its listed chance to convert an egg to Alpha is 45–55% by partner rank. Use the stated pickup effect when planning your route and check the result before hatching the batch. 1.0.5 Broncherry Aqua Partner Skill
- Read the changing numbers in the Partner Skill description. The skill description shows its current values and updates when you condense the Pal. Compare the numbers after ranking up and check whether they affect the part of the skill you use. 1.0 patch notes
- Budget Awakening for a Pal you plan to keep. Check the required element on the Awakening recipe before farming. The 1.0 guide lists 50 matching Radiant Gems and 10 World Tree Holy Water per Pal. Prioritize the Pal you depend on for repeat runs. 1.0 Awakening recipes
Dungeons, enemy bases and Terraria
- Mark dungeon entrances even when they are shut. Cave entrances stay in the same places while open entrances rotate. Mark a short loop of entrances in the region you want, then check the map or visit the next pin if the first entrance is closed. Dungeon tiers and end chests
- Go past the Alpha to get the reward chests. After catching or beating a cave Alpha, enter the room beyond it and open the end chests before exiting. That is where the dungeon can roll manuals, raid materials and other tier-specific loot. Dungeon tiers and end chests
- Choose a fast cave tier for the reward you need. Early Hillside and Isolated Island Caverns can roll both ordinary and Ancient manuals. For slabs, move to the regional tier that rolls your target. The Astral Mountains and Feybreak reward different raid pieces. Dungeon tiers and end chests
- Check the exploration reward when clearing a faction base. Version 1.0 added exploration experience to some enemy bases and dungeons. Check the clear notification before leaving and use a nearby unexplored base as a second stop on a loot route. 1.0 patch notes
- Accept the Terraria missions before the boss run. Start the crossover chain at Fisherman’s Point for its mission rewards. Pick up Beyond Dimensions before clearing the Eye of Cthulhu, then check for From the Far Side of the Moon before summoning the Moon Lord. 1.0.4 patch notes
- Set aside Hallowed Bars before crafting Terraria gear. If the Moon Lord is your next goal, reserve 100 Hallowed Bars for each Celestial Sigil you plan to craft. After the Eye of Cthulhu fight, loot the exit chests for the schematic. Celestial Sigil route
Expeditions and base research
- Send more than the minimum power when the rewards matter. Sort by Expedition Power and build the team past the required strength when spare Pals are available. Extra power increases rewards. The old advice about making the trip finish sooner predates the change. 1.0.5 expedition mechanics
- Queue a trip around the next item on your shopping list. Read the destination rewards before pressing Dispatch. Hard-mode tower clears unlock highest-danger trips with different loot. World Tree expeditions can bring back Holy Water, so queue one before leaving for a second source. 1.0.5 expedition mechanics
- Run multiple expedition stations with spare Pals. Players report running more than one station at a time. Start one trip, then check the available roster for the second and confirm you still have your field team and working crew. Player reports · July 18, 2026
- Research the job that is blocking production. At the Pal Labor Research Lab, begin with a cheap first upgrade for the work you do most. Take that branch’s Research Tips if you plan to work through it, since those bonuses speed up research in the same branch. 1.0.5 research data
- Look in research when a work-boosting building is missing. Some structures unlock through research instead of a purchase in the Technology menu. Trace the building’s research prerequisites, then spend your Ancient Pal Manuscripts on that route before broad upgrades. 1.0.5 research data
- Finish the active research before switching projects. Selecting another research stops the current one and brings up a confirmation. Check the progress first, especially on an expensive upgrade you started before leaving base. 1.0.5 research data
- Check the next research cost before using Manuscripts elsewhere. Ancient Pal Manuscripts also go into other recipes. Look at the research you want to finish, reserve its cost and use the leftovers for other projects. Austin John Gaming · 1.0 Manuscripts chapter
Supplies and late-game finds
- Stop at Ancient Hackable Towers on your route. Some rewards are tied to specific towers. Check the puzzle requirement and map pin for the schematic you want before clearing towers at random. Player reports · July 18, 2026
- Keep one useful schematic until you check its upgrades. Before selling duplicates, check whether the schematic or a lower grade is an input for an upgrade. The relevant recipe is the best check. Player reports · July 18, 2026
- Cook centrally and refill each base’s Feed Box. Make meals at one base and use the shared Guild Chest to distribute them. At each working base, move a portion into the local Feed Box where the workers can eat it. 1.0.5 Guild Chest data and October player reports
- Check a merchant before farming common ingredients. If you already have steady gold, compare the merchant’s stock with your gathering route. Buying common organs or ingredients can free your base to make harder-to-source materials. Player reports · July 18, 2026
- Give World Tree Holy Water a second source. Since 1.0.3 it can come from World Tree fishing and expeditions as well as the Large Fishing Pond. Compare those routes with drops and springs when you are already in the area. 1.0.3 patch notes
- Use the current bait and rod recommendation for late-game fishing. Read the on-screen gear recommendation before fishing Sunreach or the World Tree. Version 1.0.4 adjusted fishing difficulty and bait rewards, so judge your catch rate at the spot you plan to farm. 1.0.4 patch notes
Fishing, salvage and ponds
- Switch to Jellroy for barrels. Keep Jellroy in the active party for salvage rewards. Swap to Jelliette when casting at fish shadows. Their paired base Watering effect is separate from both activities. Fishing and salvage partner comparison
- Save Powerful Fishing Magnets for gold-banded wrecks. Bring a Water mount and Powerful Fishing Magnets for advanced salvage. Common floating barrels can be opened without the magnet. The advanced salvage attempt uses a magnet on a successful pull. 1.0 magnet route and gear
- Run wrecks when Coralum Ore is the bottleneck. Take a Water mount, bring Jellroy in your party, and leave space to collect each successful pull. Check the wreck band before spending a magnet. Compare this trip with the Large Fishing Pond if you already run one. Chupacabra Tutorials · 1.0 magnet salvage
- Bring Solmora Lux when fishing for talented Pals. Keep Solmora Lux in your party when fishing for Pals with better potential. Its skill makes talented catches easier to fish up. For item yield, use the separate Jelliette bonus. 1.0.5 Solmora Lux Partner Skill
- Pick a fishing partner for the part of the gauge you lose. Try Gloopie if progress falls too quickly when the bars separate. Bring Whalaska or Whalaska Ignis with its saddle unlocked if you can keep the bars together and want the gauge to fill faster. 1.0.5 fishing and salvage tables
- Use the world setting if fishing inputs are the obstacle. Since 1.0.4, world settings can calm fish movement during the minigame. Check the current gear recommendation in the fishing prompt too, especially on a new spot. 1.0.4 patch notes
- Match your base pond’s shadow to the loot. Assign a Handiwork Pal and choose a shadow size. The Large Fishing Pond adds a large-shadow pool with items such as Coralum Ore and Ancient Civilization Cores. Collect the catch from the container on the side. 1.0.5 fishing and salvage tables
- Check merchants for bait between fishing runs. Version 1.0 added bait to some merchant stocks, plus chests, salvage and scrap. Check your inventory after a salvage loop before paying to craft more. 1.0 patch notes
Towers, raids, Arena and oil rigs
- Plan tower fights around five minutes. The 1.0 tower timer is five minutes. If you survive but time out, check hit uptime, ammo and elemental matchup first. Hard Mode opens after the Azure Covenant Tower, so check the boss gate before hunting for a difficulty switch. 1.0.5 tower and field boss guide
- Use the Arena challenge to earn tickets solo. Enter Challenge Mode for PvE fights. A first win at a new rank has an extra reward. After that, compare tickets per minute at the ranks you can clear consistently before grinding for a shop schematic. 1.0 Arena rewards
- Check the Arena Merchant before farming a crossover schematic. Look for the V 1 and V 2 Armor schematics at the Arena Merchant. Use its Battle Ticket price to decide how many challenge wins you want to farm. Whitefalco · 1.0 Arena shop chapter
- Save a second summon until the first raid ends. Version 1.0 limits a guild to one summoned raid at a time. In co-op, agree on the next slab and rally at the raid base before the player holding it starts the fight. 1.0 patch notes
- Choose the Raid Area when your base is busy. At the Summoning Altar, choose the separate Raid Area if you want to keep the fight away from your production buildings. Bring your supplies and use the temporary structures you need there. 1.0.5 raids and Raid Area
- Approach the Feybreak oil rig by water. Use a swimming mount to approach the endgame rig and avoid relying on a flying approach against its defenses. Once aboard, work from cover between sections and learn the chest spots so you can check the next one quickly. Oil rig approaches and chest locations
- Look for the boss you have yet to clear on Hard. If your next goal is a Hard expedition, look for the tower you have yet to beat on that difficulty. A repeat Normal clear will leave the Hard expedition locked. Check the Expedition Station after the win. 1.0.5 expedition mechanics
Co-op, guilds and world settings
- Give new guild members the permissions they need. Use the 1.0 role settings to separate everyday access from permissions to manage the guild. Check access on your shared supply chest with a new member before sending the team to restock there. 1.0 patch notes
- Use a guild marker as the meetup point. Place a guild marker before crossing to a boss or dungeon with friends. Agree on one rally point and wait for the player with the needed consumable before moving in. 1.0 patch notes
- Check the world’s death rules before a long loot run. The host can inspect Death Penalty and Hardcore options in the world settings. Plan a nearby travel point or drop-off before the run if a death would leave your gear or Pals behind. 1.0.5 settings reference
- Turn on dedicated-server backups before major changes. The server setting bIsUseBackupSaveData enables world backups. Check that the server is producing saves and make a separate copy before a major update or changing settings that affect the whole group. Pocketpair dedicated server settings · 1.0.4
- Tune worker limits one step at a time on a shared server. Raising the number of bases or workers increases server load. Change one cap at a time and compare responsiveness at your busiest base while the usual crew is online. Pocketpair dedicated server settings · 1.0.4
Next up

Last checked November 9, 2026. Unofficial fan guide, not made or endorsed by Pocketpair.